HBAS Store
Electrical Components
for Boats and Yachts

HBAS Store
Electrical Components
for Boats and Yachts
WARNING: If you are not knowledgeable about electrical systems, please hire a professional electrician to complete the electrical installation of the HBAS. Also, it is very important to keep the HBAS switch in the OFF position until the installation is complete. Remember to keep the switch in the OFF position whenever you work on the HBAS.
To avoid corrosion and failures in the electronic connections and circuits, the installation of the HBAS must be carried out in a protected and dry place. In addition, places with poor ventilation and high temperatures should be avoided. A good practice is to select a location close to the battery or battery switches, if they are not located inside the engine room, in a place protected from sunlight and rain. In addition, places with extreme humidity should be avoided.
| House Current Amperage | Minimum Wire Size |
|---|---|
| < 30A | #10 AWG |
| < 40A | #8 AWG |
| < 50A | #6 AWG |
CAUTION: Turn the HBAS switch to the off position before making any connections. To avoid the risk of
short circuits, leave the ground connection for last. Also, use red wires for the positive wires and black or yellow
wires for the negative wires.
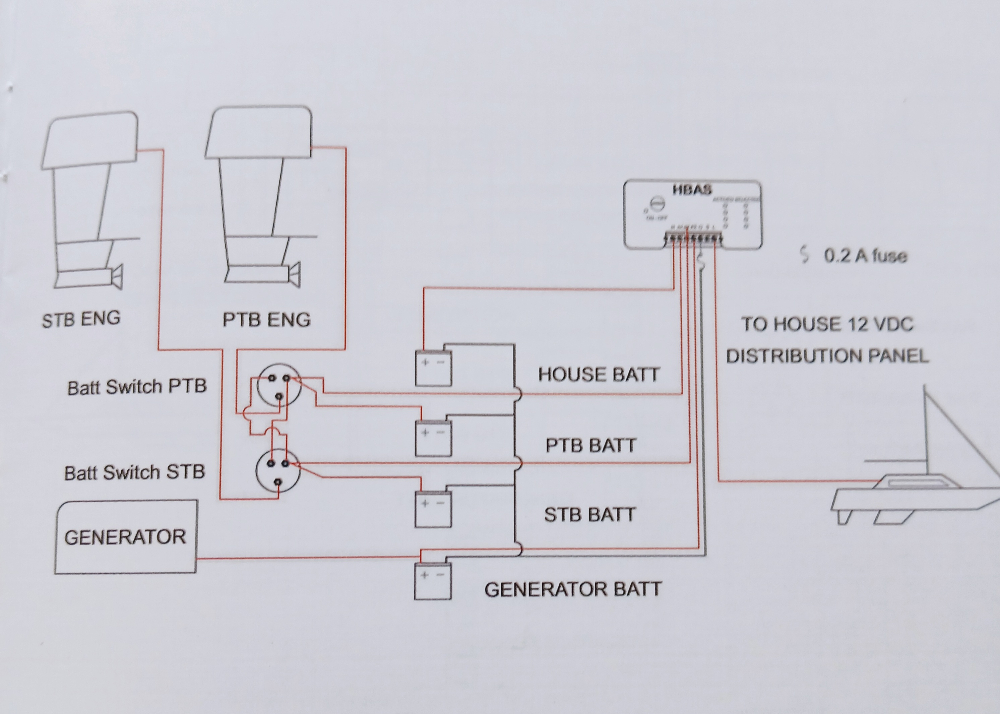
Select a battery bank of your choice to power the house, and run an appropriately sized wire from the positive
battery terminal to the terminal marked with an H on the HBAS connector.
Connect the remaining positive battery banks to their respective terminal on the HBAS connector, marked A1, A2, A3.
The HBAS has a priority order for battery usage, with the house battery having the highest priority, followed by A1, A2,
and A3 with the lowest priority for usage.
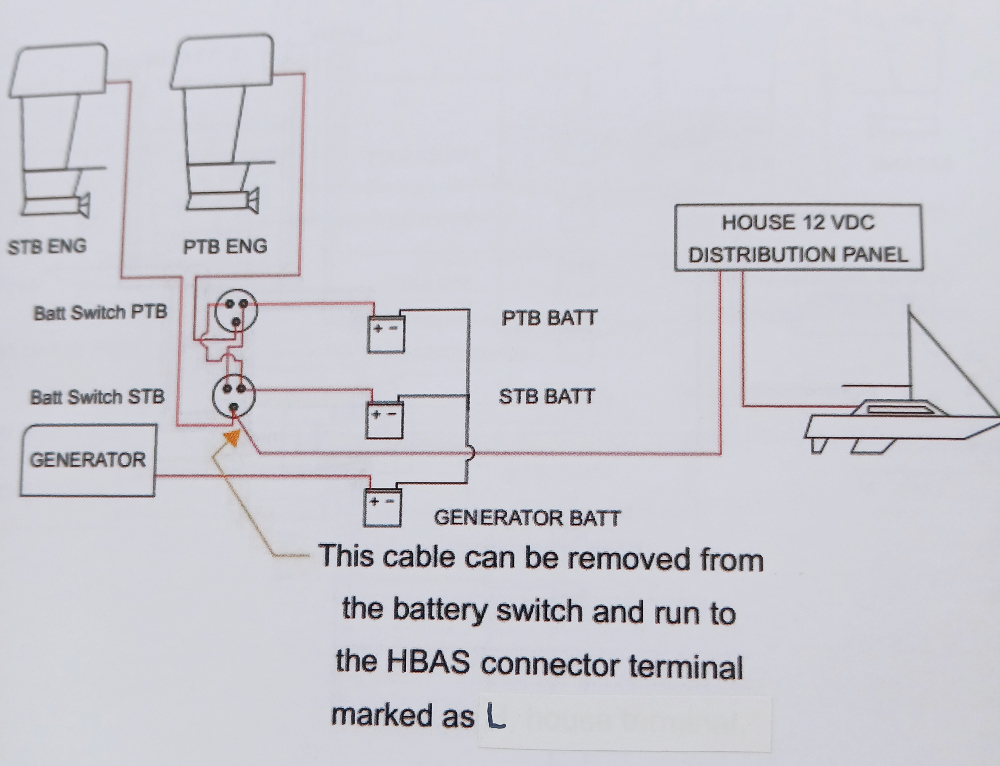
Run a wire, with the appropriate gauge, from the terminal marked L (Load) on the HBAS connector to feed power
to the boat house 12 VDC distribution panel (you can find this wire often located on the post marked Common, where
the positive engine wire connects on your battery switch).
Finally, connect a small size wire (such as #16 AWG), colored black or yellow, to the common negative ground
of the battery system, and run it through a 0.25A fuse to the terminal marked G on the HBAS connector.
The fuse holder should be placed inside or as close to the connector as possible.
H ------ Wire comes from the house battery bank positive.
A1 ----- Wire comes from an auxiliary battery bank (engine battery bank, or other).
A2 ----- Wire comes from an auxiliary battery bank (engine battery bank, or other).
A3 ----- Wire comes from an auxiliary battery bank (engine battery bank, or other).
G ------ Wire comes from the common negative of the battery systems
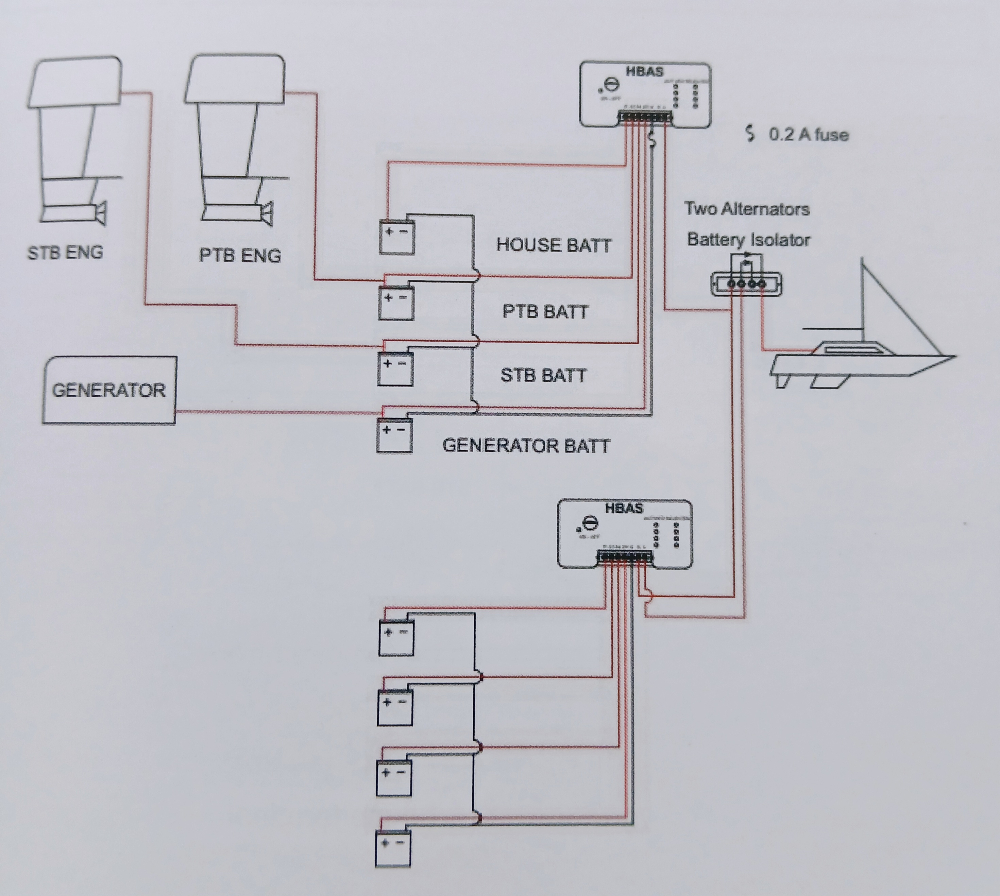
S ------ (Optional) The wire comes from the L terminal in the previous HBAS, for series configuration. To connect two or more HBAS in series, it would be necessary to use an isolator diode, to feed the same distribution panel, or to split the panel power for each HBAS. Applying a positive current of 12 VDC to this terminal would turn off the HBAS (which will be useful for controlling it remotely).
L ------ The cable will go to feed the 12V DC distribution panel in the boat house.
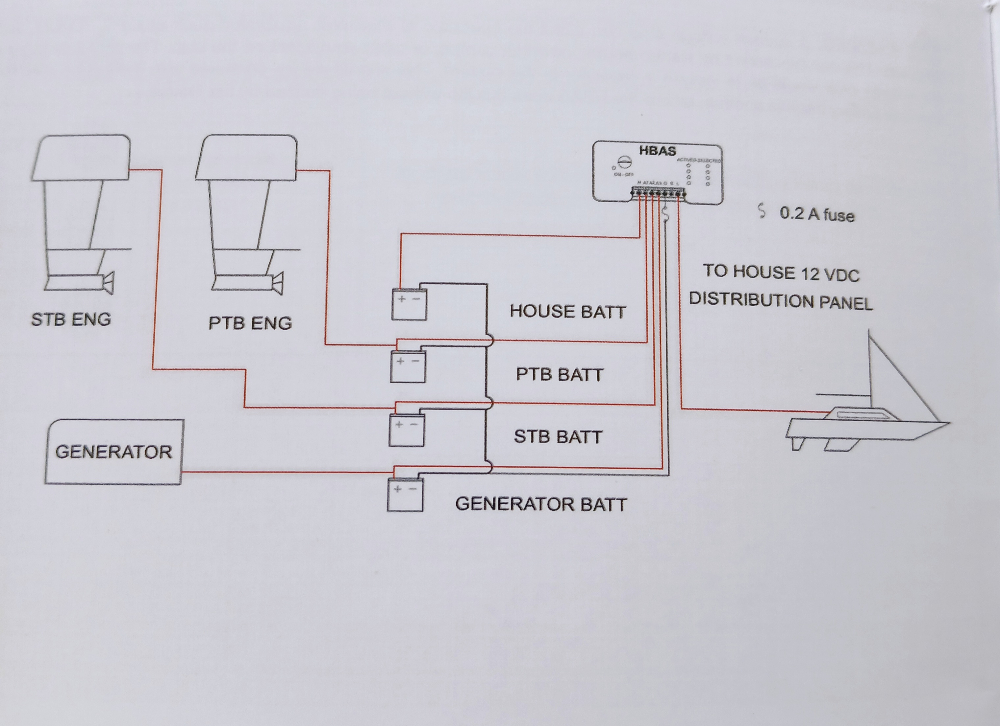
This wiring shows how to connect the HBAS directly to the batteries you intend to use in the house, in this case four batteries, but it can be any number between 1 and 4.
